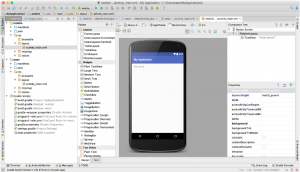
An IDE or Integrated Development Environment is a software to run and execute your code. It has a lot of features which make development faster like code completion, organizing your project, searching for resources in your project, debugging your code etc. It can also be extended by installing plugins. For example, there is a plugin called key promoter which helps you learn keyboard shortcuts for the IDE by showing a modal window with the shortcut when you do an action/sequence of actions 3 times via mouse. For Android development the de facto IDE is Android Studio. It used to be eclipse previously but Google is not supporting it anymore. Android studio is a customized version of Intellij Idea by Jetbrains . Below is a photo of the Android Studio interface.

Android SDK (software development kit) is the set of libraries and resources (documentation, images, emulator etc ) that are required for development of application. A library is a collection of useful code which can be shared across easily. Imagine someone has written some code to perform some mathematical calculation. If they want to share their code to others, the easiest way would be to bundle it as a library and share.Android SDK comes bundled with android studio but can be downloaded separately and configured along.
Google provides different set of libraries and resources for different versions of the Android OS. All the resources can be updated within Android studio. You generally don’t have to worry about different versions because it is backwards compatible most of the times
After setting up and running the IDE, you’d want to try and run a basic android app. Fortunately, Android Studio has plenty of samples that you can easily import and run.
Once you import a sample you can think about running it. There are two ways that you can run your application: an emulator or a real device.
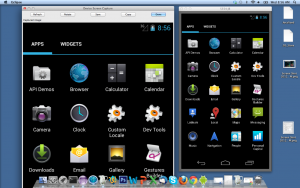
An emulator is a software application designed to mimic the behavior of a real device. It’s very useful in testing because you don’t need to buy an actual device. You can emulate different OS versions, screen sizes, display densities, some hardware features. It gives you look and feel of an actual phone/Tab on your PC or Mac.
Since Android is an open source operating system adopted worldwide and used in devices of varying features, it’s hard to test compatibility. This is where the emulator comes handy. Having said that, some features like NFC, Bluetooth cannot be emulated and you will need to use real devices for that. Also it is advisable to run production apps on real devices before releasing.
Android SDK comes bundled with default emulator image for a specific OS version. You can download and install different emulator images through Android Studio as well. The emulator images are called AVDs or Android virtual devices.
There are also some third party emulators available that you can use to run and test your apps. For example, there is GenyMotion, BlueStacks, and remix OS emulators.
Once you have set up an AVD, you can then proceed to run your application.

When you want to run you app on a real device, you would need a compatible device connected to your PC via USB. You would first need to install manufacturer provided driver software for that model installed on your PC. A driver is a piece of software that interfaces with a device’s hardware and a computer.
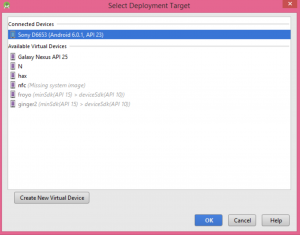
Installing drivers for different phone models is slightly different depending on the manufacturer and the model number. But it is a very similar process. Here is an example for Samsung devices. Once that is done, your device shows up as a runnable option when you press run button on Android Studio.

As you can see in the picture, my Xperia Z3 device shows up after I have configured it.


