Computer Science

Introduction

1Introduction

Welcome to the world of Apple’s mobile platform, you must be here to learn about the basics of iOS development. Here we will give you a guide to learn the process from the ground all the way to an experienced developer. With time and dedication, you can make it happen on your own, just make sure not to give it up before the finish line.

Nowadays, in the time of cloud computing, it’s easy to start learning even without a single Apple device. Back in the day, when Objective-C was the only way to code for iPhone, it was thought difficult to learn even the basics of iOS development.

No Resources

Check the other sections in this syllabus to find more resources!

Prerequisites

2Prerequisites

Swift

At 2014 Apple introduced its new general-purpose, multi-paradigm, compiled programming language called Swift. It’s an alternative to the Objective-C language that employs modern programming-language theory concepts and strives to present a simpler syntax. During its introduction, it was described simply as “Objective-C without the C”. After version 3.0, we kinda say it’s production ready, it’s excellent for learning proposes and in-house apps, but not always sufficient for enormous corporate products on it’s own.

For learning the basics of Swift language, you will only need a browser and the IBM Swift Sandbox where you can get familiar with the syntax and more

Xcode

8Xcode

Apple’s integrated development environment aka IDE. It’s only available on the Mac App Store for free and include the tools, compilers and frameworks for iOS, tvOS, watchOS and macOS development.

Interface Builder

Xcode has an integrated XML Interface Builder to visually edit iOS, watchOS, tvOS and macOS interfaces stored as XIBs/NIBs and Storyboard files. Simply drag and drop windows, buttons, text fields, and other objects onto the design canvas to create a functioning user interface without writing any code. If you’re confused on some of the terminology, don’t worry! Click on the resources below this section, which will take you into the wonderful world of xCode.

User Interface

9User Interface

View Controllers

The user interface will be built by static and dynamic elements. The simple elements like UILabel, UIButton, UITextfield, UITextView, UIScrollView, etc are mostly not reuseable by their own and made to present static elements, while UITableView and UICollectionView is built in mind to present reusable content efficiently. They can handle 1000 of cells and items with high performance if you fulfill some simple rules. You can find an article about smooth scrolling in the resources.

The interface is based on a Model-View-Controller design pattern, where the interface can be built using the Interface Builder without any code. Then you can connect and add the code for its corresponding view controller.

Storing User Data

9Storing User Data

Saving Data

Most of the time you need to store at least a few small details about your user, like a name, a password, a session token or a Boolean value about a fired tutorial screen. While other times you need to maintain a whole bunch of data in a complex database, or just save same draft images to the disk.

Saving Data to Shared User Defaults

The simplest way to save non-critical user data is to store in the user defaults. It’s just like a dictionary, a static collection of key-value pairs. Have you ever find some hidden toggles for an iOS app in the settings? Those values are also stored here for sure.

Notifications

9Notifications

Local Notifications

Sometimes you need to remind the user once or twice at a specific time. You can make this by secluding some local notifications which can also be repeated in specific time periods.

Push Notifications

Other times notifications triggered by remote events, like other users, or the developer tries to reach you with some information. These push notifications can contain new data and could even wake your app for a small period to fetch new information.

Libraries & Community

5Libraries & Community

Cocoa Controls

By using open source UI components, wrappers or frameworks, you can save a ton of time, therefore you can spend more time to make your app awesome. Don’t hesitate to use as many as you like. Find the most awesome ones in the resources.

CocoaPods

It’s a dependency manager for Swift and Objective-C Cocoa projects. It has over 30 thousand libraries and is used in over 1.9 million apps. CocoaPods can help you scale your projects elegantly.

Distributing Your App

4Distributing Your App

Apple Developer Program

Once you finished your first app, you may want to distribute it to testers or to the world, right? For both you need to enroll to the Apple Developer Program, which will cost you 100$ a year. With a paid developer account, you can access all the latest beta software and can distribute to iPhone, iPad, Mac, Apple Watch, and Apple TV.

Archiving your App

To create a distributable iOS application archive aka IPA, you need to setup your code signing properly and archive your product with Xcode. The archive will contain all of your code and resources (images, fonts etc.) in one bundle. You can find your previous archives as well as your new archive in the Organizer window, where you can upload, export or validate it.

What’s Next?

6What’s Next?

Speed up development

After a while, you will notice that hall of your coding spend on setting up tableview for a signup form or for some dynamic data. Well, you can speed this up by making a few template Storyboards, but there must be a better way, right? Well there is, and one of the best solution is using eureka which is an elegant iOS form builder written in Swift, with built in solution for all the most popular tableview usages.

Reactive Programming

“ReactiveX is a combination of the best ideas from the Observer pattern, the Iterator pattern, and functional programming”.

Introduction

6Introduction

Making a website can sound scary and difficult, but if you strip it out into pieces, you’ll see its really one of the easiest and most accessible ways to begin studying Computer Science. Starting out is simple and it slowly builds in complexity as you learn more advanced topics.

The scariest part is figuring out where to start, and what path to follow. Luckily, we want to solve that first problem for you by putting together this Web Development syllabus.

No Resources

Check the other sections in this syllabus to find more resources!

Introduction

7Introduction

In today’s world it would be hard to find someone who hasn’t heard of android. Do you have a killer app idea that you think is going to change the world? With around 2 billion monthly users worldwide it is an interesting and one of the major platform to develop apps for.

As this chart points out, it is a lucrative career choice even if you are working for somebody. Source.

No Resources

Check the other sections in this syllabus to find more resources!

Prerequisites

8Prerequisites

Core Java

Java is the primary language used for developing android apps. Core java concepts should be very clear before diving into android development. Concepts like method overriding, inheritance, interfaces, and anonymous inner classes are commonly used in android development.

XML

XML or extensible markup language is used mostly to define UI layouts for android apps. It is also used to define some drawable shapes and menu items. Basic knowledge of XML is sufficient. W3Schools has a good reference guide.

Setting Up First App

5Setting Up First App

IDE

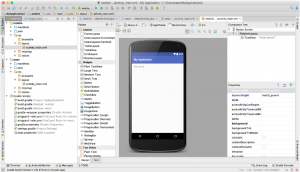
An IDE or Integrated Development Environment is a software to run and execute your code. It has a lot of features which make development faster like code completion, organizing your project, searching for resources in your project, debugging your code etc. It can also be extended by installing plugins. For example, there is a plugin called key promoter which helps you learn keyboard shortcuts for the IDE by showing a modal window with the shortcut when you do an action/sequence of actions 3 times via mouse. For Android development the de facto IDE is Android Studio. It used to be eclipse previously but Google is not supporting it anymore. Android studio is a customized version of Intellij Idea by Jetbrains . Below is a photo of the Android Studio interface.

Android Studio interface
Android SDK

Android SDK (software development kit) is the set of libraries and resources (documentation, images, emulator etc ) that are required for development of application. A library is a collection of useful code which can be shared across easily. Imagine someone has written some code to perform some mathematical calculation. If they want to share their code to others, the easiest way would be to bundle it as a library and share.Android SDK comes bundled with android studio but can be downloaded separately and configured along.

Project Configuration, Screens & Basic Layouts

16Project Configuration, Screens & Basic Layouts

Android Studio Sections

Now that we have setup Android Studio and ran our first app, we need to understand different components of the project and different sections of Android Studio.

The “Meet Android Studio” in the Android Studio documentation resource link below explains the different sections/windows and components of Android Studio very well. Also I have given an excerpt from it for an overview.

More UI Components, User Interaction & Screen Navigation

10More UI Components, User Interaction & Screen Navigation

Aggregate UI components

Simple UI components/widgets like TextView, Buttons, Radio Buttons etc can only display limited amount of UI at a time. For example if you want to display a scrolling list of text, you can’t create 10 or 100 different TextViews in your layout. In these cases you need UI components that can show aggregate data.

There are different UI views that can show aggregate data in android like

Using Dialogs & Saving Data

7Using Dialogs & Saving Data

Dialogs

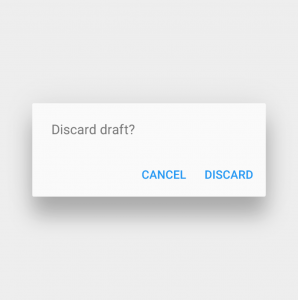
Dialogs (sometimes called modal windows) are used when there is immediate interaction needed with the user. The dialogs stop the user’s interaction from any other UI component till any action is taken on it. Most of the times they are used to alert user of something/get confirmation or used to get input without which the app cannot proceed further. An example would be a “Discard draft?” popup message.

Android Modal Window example
Saving data

For a good user experience we need to save regularly needed user data in our app. For e.g. Facebook app saves your login info so that you don’t have to login every time when you open their app.

Location & Maps

5Location & Maps

Location

Almost all the Android phones have an ability to get your current location. A lot of apps use this feature to give a better user experience. For e.g. navigation apps like Google maps use your location information to help you navigate from one location to another. Dating apps use this feature to find other users near you. As an android developer it is important to know how to access user location so that it could be used to give them a better experience or integrate with your service.

Maps

I believe that mapping technology along with gps has revolutionised travel. Google maps provide you with navigation, mapping, live traffic etc. As a developer you can leverage these services google provides in your own application. Google provides services for geocoding (converting location into an address) maps, navigation etc. to developers as well.

Loading Websites

3Loading Websites

Loading Websites

Android SDK has a nifty configurable UI widget where in you can load websites within the app itself. The widget is called WebView. WebView is a UI widget just like any other UI view (Button/ TextView etc.) which can be placed or sized however you want in your layout. It is like an embedded mini browser in your app that can load any website you want

Connecting to the Internet

Perhaps the most frequent architecture that a lot of companies follow is that they have a web service and use an app/website as a front end. Take an example of taxi app like Uber. They have an app for making booking, payments, cancellations etc. and a backend web service which facilitates all of this. The app programmatically connects to their web service through the internet and exchanges data to and fro as required.

Uploading To Google Play Store

4Uploading To Google Play Store

Google Developer Account

So once you have created your own app, how would people get it or how would they buy it? You would need to upload your app onto Google Play Store. Google play store is a marketplace for android apps. Almost all of the android phones have it preinstalled from where they can download and install app.

To be able to upload apps on the play store, you need to have a developer account. It is a paid account and it costs 25$ as a onetime fee.

Tips, Best Practices, Libraries & Community

5Tips, Best Practices, Libraries & Community

Tips

There are a lot of tips for beginners in Android development. Not all of them will be applicable for you. Honestly it takes practice and trying out a lot of different things to see what works for you and what does not. Here is a good article with a list of some great tips and tricks.

Best Practices

As a developer/designer, there are some of the best practices and guidelines that you can follow to make your app look good, or make it faster. Again, it depends upon you what to follow and what not.

Introduction

10Introduction

From early concept art to marketing illustrations to final in-game assets, art takes an important role in game design. It can be a daunting task figuring out what kind of art your game needs, how to hire and direct artists, and finally implementing all of that in a way that works.

Depending on what stage your game’s development is currently at, some sections of this article may or may not be applicable to you, however it covers a cursory look at the process for sourcing and implementing art for games.

No Resources

Check the other sections in this syllabus to find more resources!

Prerequisites

11Prerequisites

As this is a cursory guide to the subject, you should already have an understanding of, or are about to learn, the engine or language your game will be developed in. Some preexisting knowledge in editing programs, game art, and art pipelines are also helpful to have.

Partners:
https://lemoncasino77.com/
nine casino
unique casino
wazamba
lemon casino
f1 casino
lemon casino
lemon casino
stelario
https://lemoncasino77.com/

No Resources

Check the other sections in this syllabus to find more resources!

Style

12Style

What kind of art does your game need? A pipeline describes the creation and implementation of art for a video game, and while there are many styles of art, very broadly speaking, game art falls into two main pipelines: 2D and 3D.

  • A 2D pipeline generally covers concept art, 2D animation, and finished 2D assets for use in game.
  • A 3D pipeline generally covers concept art, 3D modeling, texturing, and 3D animation/rigging.

An artist can have multiple roles or be highly specialized in just one. While established companies may hire people strictly specialized in their field, such as a 3D artist who only creates 3D models, an indie studio may prefer one or two broadly skilled artists to cover multiple roles.

No Resources

Check the other sections in this syllabus to find more resources!

Sourcing Art

13Sourcing Art

You can obtain art for your game one of three ways: make it yourself, hire an artist, or find premade art assets on the web.

Pre-made assets are abundantly available on most current game engine marketplaces, individual artist stores, and places like Gumroad, Behance, Dribbble, and more. Many asset packages sit comfortably within indie budgets (some are even free!) and are also used in AAA development to allow artists to focus on more important objects instead of fleeting background items.

Hiring Artists

6Hiring Artists

You’ve decided to hire an artist, but how do you know which ones are professional, can commit to your vision, and create what your game needs?

Whether they’re a seasoned game designer or a student, most, if not all, game artists have an online presence in the form of a portfolio site and social media. Websites like Artstation, Behance, Gamasutra, CGSociety, and publications like ImagineFX are built to showcase new game artists. Additionally, artists widely use social media like Instagram, Tumblr, and Twitter for showing off professional and development work.

Directing Artists

7Directing Artists

If you haven’t already, you should first form a Game Design Document (GDD), or alternatively, a collection of reference images. An artist has no idea what a client means by a “cool warrior character”, however they can concretely understand a moodboard showing the specific type of armor the character wears, likenesses their appearance is based on, and paintings matching the desired art style. Pinterest, Tumblr, and even Google Drive are widely used tools for compiling and sharing reference material. A good game artist can nail a design in very few iterations, but regardless expect some back-and-forth between you and your artist until you’re satisfied with their work.

If you’re leading a game’s development, it’s up to you to also send any relevant technical information to your artist. Technical information commonly includes things like file formats, image sizes, and engine limitations. If you’re unsure what kinds of technical specs your artist needs… ask!

Implementing Art

4Implementing Art

How your art is to be implemented into your game engine should be on your mind from the start. Study the ins and outs of the engine you’re using, if any, and connect with others more experienced than you. Ask, ask, ask, and don’t be afraid to contact other game developers to see how they’re accomplishing their project.

You may run into roadblocks in the form of assets not working in the way you expected them to, or garbled communication between team members. Don’t give up and persevere- bugs and unexpected issues are a natural part of game development whether you’re a one-man team or a part of a huge company. Never forget that you’re solving dozens if not hundreds or thousands of problems when developing a game!

No Resources

Check the other sections in this syllabus to find more resources!

Introduction

5Introduction

Are you looking to play beautiful looking pc games on high settings? Do you want to save a lot of money? Do you want to be a pc gamer? Chances are that’s why you’re here. Welcome to the wonderful PCMasterRace. Surprisingly, building a PC is actually one of the easier tasks to complete in the Computer Science field. All it requires is getting 6-7 components and connecting them all together.

This syllabus will provide resources explaining each component, how to pick the components, and how to put them together (with some advice)! By the end of it, you will be a fully capable PC Builder.

No Resources

Check the other sections in this syllabus to find more resources!

Prerequisites

6Prerequisites

None! This is a fully beginner tutorial. Remember though, this is an investment – know exactly what your needs are. Wanting to be a developer vs. wanting to play Counter Strike on medium settings vs. wanting to play [insert crazy intensive beautiful game] on ultra settings and recording it is all going to require different budgets.

Know your environment too. Is this a PC that’s going to be in your room forever? Is this a machine you want to transport to and from work/college/hackathons?

No Resources

Check the other sections in this syllabus to find more resources!

Components

7Components

I was going to put all the components in separate sections, but I think that would be overkill. I’ll explain them here quickly, and leave resources to further explanations if you think you need it (it’s okay if you do). Here we go:

Case

This is what your computer is housed in. They come in a couple different size types. This is where you get to have a little fun and get the perfect style for you – just make sure it’s sized according to your environmental needs, and that it’s compatible with the sizes of your other components